
Understanding Studio Lighting Essentials
What is Studio Lighting?
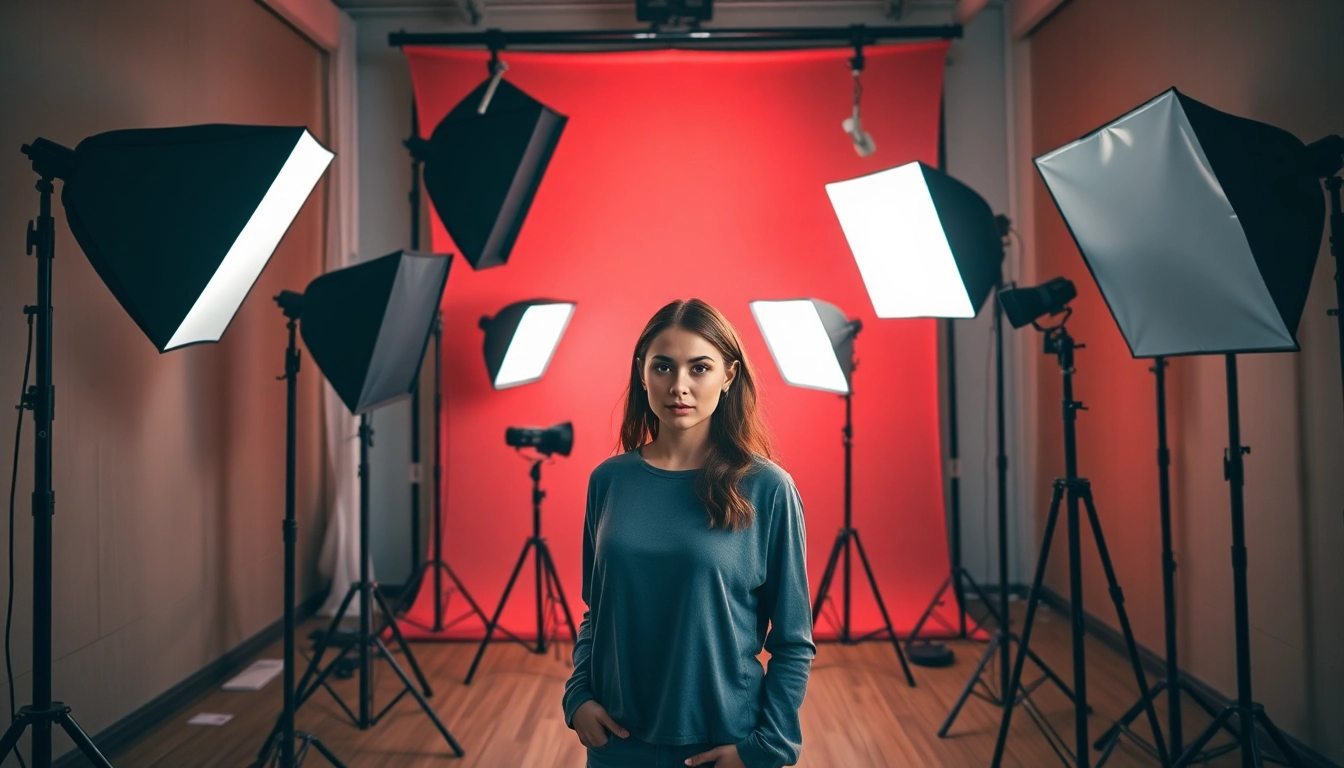
Studio lighting is a controlled method of illuminating subjects in photography, primarily used in studio environments. It allows photographers to create a wide range of moods and effects by manipulating light intensity, direction, and quality. Unlike natural lighting, studio lighting can be adjusted to achieve consistent results, making it an essential skill for photographers aiming for professional quality images. For those looking to refine this technique, a studio lighting photography course can be invaluable.
Key Lighting Equipment for Photography
Understanding the essential equipment is vital for achieving the desired lighting in your photographs. Key components include:
- Light Sources: This can include continuous lights, flash units, and LED lights. Each type has its unique benefits depending on your subject and desired outcome.
- Light Modifiers: Modifiers such as softboxes, umbrellas, and reflectors help diffuse and direct light, allowing you to soften harsh shadows or increase light spread.
- Light Stands: A good light stand provides flexibility and stability for positioning lights where they are most effective.
- Backgrounds: While not a light source, the background you choose significantly impacts the overall composition and lighting effects in your photographs.
Basic Principles of Light and Shadow
Mastering light and shadow is crucial in studio photography. Key principles to consider include:
- Direction: The angle and position of your light source will determine the shadows it creates. Experimenting with different angles can yield diverse effects.
- Quality: Light quality can be hard or soft depending on the light source and use of modifiers. Soft light creates gentle shadows, whereas hard light produces sharp contrast.
- Intensity: Adjusting the power of your light affects exposure and mood. Higher intensity can create dramatic effects, while lower intensity promotes a softer feel.
- Color Temperature: The color of your light can influence the mood; warm light conveys coziness, while cooler tones can evoke a more clinical environment.
Setting Up Your Studio for Success
Choosing the Right Space for Your Studio
Selecting the optimal space for your studio is vital. Look for a location with enough room to set up your lighting equipment and manage backdrops easily. Ideally, choose a space with access to power outlets and some control over ambient light. Basements, garages, and spare rooms can often provide the necessary environment. Consideration of the layout will be key to how efficiently you can operate and create.
Arranging Your Lighting Setup
Once you’ve selected your studio space, the arrangement of your lighting setup plays a significant role in your final imagery. A few arrangements to consider are:
- The Triangle Setup: Position one light key, one fill, and one background light to create depth and dimension.
- Loop Lighting: Use a primary light positioned at a 30-45 degree angle from your subject to create shadows for a more three-dimensional effect.
- Rembrandt Lighting: This classic technique employs a light source positioned above and to one side of the subject, creating a small triangle of light on the opposite cheek for dramatic effect.
Creating a Comfortable Environment for Subjects
A key to successful photography is making your subjects feel at ease. This involves creating a comfortable atmosphere where they can relax and express themselves. You might consider:
- Maintaining a pleasant temperature in the studio to prevent discomfort.
- Encouraging subjects to interact and pose naturally rather than stiffly.
- Playing soft background music or engaging them in conversation to ease tension.
Advanced Techniques in Studio Lighting
Using Softboxes and Umbrellas Effectively
Softboxes and umbrellas are essential tools for achieving soft, diffused light. They reduce harsh shadows and create a more flattering look for portraits. To maximize their effectiveness:
- Position softboxes at an angle to the subject to produce even light across the face.
- Use multiple softboxes strategically to eliminate shadows from different angles.
- Experiment with distance; moving a softbox closer will give softer light, while moving it further will create a harder look.
Implementing Backlighting Techniques
Backlighting can create a captivating effect that highlights the subject’s outline, adding drama and depth. Here are tips for effective backlighting:
- Position the backlight behind the subject at a height that achieves the desired halo effect.
- Utilize a fill light in front of the subject to prevent it from being lost in shadow.
- Use reflectors to bounce light back onto the subject, ensuring they remain visible.
Achieving the Perfect Exposure
Understanding exposure settings is essential for optimal photography results. Start by knowing your camera’s settings and how they affect exposure:
- Aperture: Controls the amount of light entering the lens; a wider aperture results in brighter images.
- Shutter Speed: Determines how long your camera’s sensor is exposed to light; faster shutter speeds freeze action but require more light.
- ISO: Sensitivity to light; increasing ISO can brighten images in low light but may introduce noise if set too high.
- Ensure your lighting setup provides adequate illumination, adjusting your camera settings as necessary to achieve perfect exposure.
Post-Production and Editing Tips
Basic Editing Techniques for Studio Shots
Post-production is where you can enhance your images further after capturing them. Key editing techniques include:
- Cropping: Remove unwanted edges or distractions that take emphasis away from your subject.
- Noise Reduction: Address graininess that may occur at higher ISO settings with noise reduction tools.
- Sharpening: Apply sharpening techniques carefully to enhance details without creating artifacts.
Color Correction and Lighting Adjustments
Post-capture, you may need to address color imbalances or lighting inconsistencies. Consider the following:
- White Balance: Adjust white balance to ensure colors appear natural according to the lighting conditions.
- Exposure Correction: If images appear too dark or washed out, use exposure adjustments to correct brightness issues.
- Color Grading: Introduce creative effects with color grading to achieve a certain mood or aesthetic within your images.
Creating Stunning Final Images
Once editing is complete, your final images should shine. Emphasize storytelling through your photographs by focusing on:
- Maintaining consistent editing styles across series or projects to establish a recognizable look.
- Utilizing composition techniques to guide the viewer’s eye and highlight important elements.
- Choosing the appropriate format for sharing, whether digital or print, ensuring clarity and quality in presentation.
FAQs About Studio Lighting Photography Course
What is the importance of lighting in photography?
Lighting is crucial as it shapes how your subjects appear, affecting mood, clarity, and focus in photographs.
Do I need expensive equipment for studio lighting?
No, while high-end gear can help, many affordable options can produce great results for beginners.
How can I create a mood with studio lighting?
Experiment with light direction, intensity, and modifiers to set the desired ambiance in your photos.
Is studio lighting different from natural lighting?
Yes, studio lighting is controlled and adjustable, allowing for consistent results compared to variable natural lighting.
Can I learn studio lighting online?
Absolutely! Many online courses provide tutorials and guidance for mastering studio lighting photography skills.