Understanding Tile Installation Basics
What is Tile Installation?
Tile installation is the process of laying tiles on surfaces such as floors, walls, and backsplashes. It involves a systematic approach, ensuring tiles are placed correctly for both aesthetics and durability. Professionals in the field, particularly Tile Installater Salem, understand the intricacies of this craft, which include preparing the surface, cutting tiles, applying adhesives, and grouting. Successful installation enhances the visual appeal of spaces while providing a long-lasting finish.
Types of Tile for Various Projects
Selecting the right type of tile is crucial for achieving the desired outcome. Common types include:
- Ceramic Tiles: Ideal for both walls and floors, available in various colors and patterns.
- Porcelain Tiles: Denser and less porous than ceramic, suitable for high-traffic areas.
- Vinyl Tiles: Affordable and easy to install, perfect for DIY projects.
- Natural Stone Tiles: Includes options like granite, marble, and slate, each offering unique aesthetics.
- Glass Tiles: Often used in backsplashes, they add a luxurious touch and come in various colors.
Common Installation Methods
Proper installation methods vary based on the tile type and area of application. Here are some popular techniques:
- Thin-Set Installation: Involves applying a thin layer of mortar to bond the tiles to the substrate, often used for ceramic and porcelain tiles.
- Backer Board Installation: Utilized for wet areas, such as bathrooms, where moisture resistance is essential.
- Floating Installation: Common with vinyl tiles, this method allows the tiles to “float” above the subfloor without adhesive.
- Dry-Set Installation: Involves using a dry adhesive powder that activates with water, ideal for wall tiles.
Choosing the Right Tile Installer in Salem
What to Look for in a Tile Installater Salem
Finding a qualified tile installer is key to ensuring a polished finish. Here are essential traits to consider:
- Experience: Look for installers with a proven track record in residential and commercial projects.
- Insurance and Licensing: Confirm that the installer holds the necessary licenses and carries insurance to protect against any accidents.
- Portfolio: Review past work to assess quality and style compatibility with your project.
- Customer Reviews: Check online reviews and ask for references to gauge customer satisfaction.
Verifying Credentials and References
It’s essential to verify an installer’s credentials. This includes checking their license status, insurance coverage, and any complaints filed against them. Asking for references allows you to speak directly with previous clients about their experiences. Confirming an installer is bonded can also offer financial protection in the case of incomplete work.
Questions to Ask During Consultation
During your consultation with potential installers, consider asking the following:
- What types of tiles have you worked with previously?
- Can you provide references from past projects similar to mine?
- What is your estimated timeline for completing this project?
- How do you handle unexpected challenges during the installation process?
- What warranties do you provide for your work?
Preparing for Your Tile Installation
Assessing Project Scope and Budget
Before any installation begins, it’s critical to assess the project’s scope, including the size of the area, type of tile, and design complexity. Budgeting should encompass not just tile costs but also labor, tools, and materials. An accurate budget helps avoid surprises and ensures sufficient resources are available.
Choosing Tile Styles and Designs
The style of the tile should align with the overall design of your home. Consider factors like:
- Aesthetic: Match tile colors and patterns with existing decor.
- Functionality: Choose tiles that match the area’s use, e.g., slip-resistant tiles for wet areas.
- Trends: Research current design trends while ensuring the style remains timeless.
Preparing Your Space for Installation
Preparation is key to a successful tile installation. Clear the area of any furniture, appliances, or obstructions. Ensure the surface is clean, dry, and level to avoid complications during installation. Any necessary repairs to the subfloor should be addressed beforehand, as a stable base is crucial for durability.
Tile Installation Process
Step-by-Step Installation Guide
Following a systematic approach ensures the best results in tile installation. Here’s a general step-by-step guide:
- Preparing the Surface: Clean and level the area, ensuring the subfloor is suitable for tile.
- Marking Layout: Use a chalk line to mark the center of the room, which serves as a guide for tile placement.
- Applying Adhesive: Spread the mortar or adhesive using a trowel, working in small sections.
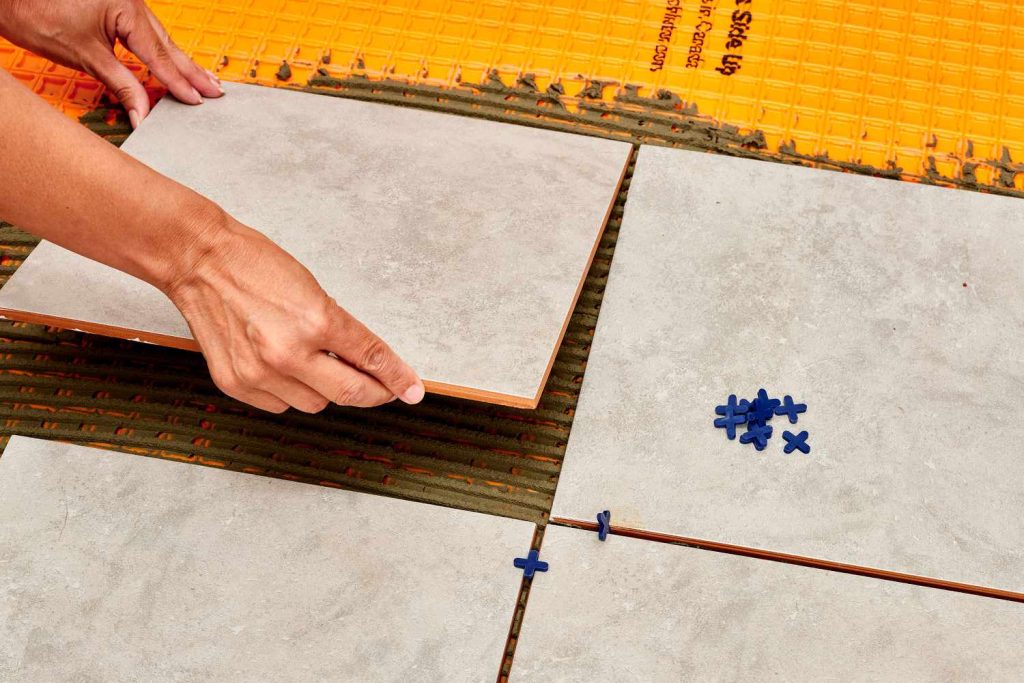
- Laying Tiles: Start from the center, pressing tiles firmly into the adhesive and ensuring even spacing with spacers.
- Cutting Tiles: Utilize a wet saw or tile cutter to make necessary cuts at edges and corners.
- Grouting: Once the tiles set, fill the spaces between them with grout using a rubber float. Clean excess grout from the tile surface.
- Sealing: Apply a sealer on grout lines (especially in wet areas) to prolong durability.
- Final Inspection: After drying, check for any uneven tiles and make necessary corrections.
Tools and Materials Needed
Having the right tools and materials simplifies the installation process. Essential items include:
- Tile Cutter or Wet Saw: For cutting tiles accurately.
- Trowel: To spread mortar or adhesive evenly.
- Spacers: To maintain consistent gaps between tiles.
- Grout Float: For applying and smoothing grout.
- Level: To ensure tiles are even.
- Sealer: To protect grout and tiles from moisture.
Handling Common Challenges
Tile installation can present various challenges. Here’s how to handle some common issues:
- Uneven Floors: Use leveling compounds to rectify dips or bumps before installation.
- Tile Breakage: Keep spare tiles on hand for replacements. Handle tiles carefully during installation.
- Grout Cracks: Ensure grout is mixed properly and allowed to cure adequately. Regular maintenance can prevent cracking.
Post-Installation: Maintenance and Care
How to Maintain Your New Tiles
Proper maintenance after installation extends the lifespan of your tiles. Consider these care tips:
- Regular Cleaning: Use a pH-balanced cleaner and a soft mop to avoid damaging the tile surface.
- Avoid Harsh Chemicals: Stay clear of abrasive cleaners that can scratch or dull the finish.
- Sealing: Reapply tile and grout sealant every few years to maintain resistance to moisture and stains.
When to Schedule Professional Help
While DIY care is beneficial, there are times when professional help is necessary:
- When tiles are cracked or damaged and need to be replaced.
- If grout lines are frequently cracking or discoloring.
- During severe renovations that require expert assessment.
Common Repairs for Tile Installater Salem
Common repairs include regrouting areas that show wear, replacing cracked tiles, and fixing loose tiles. Engaging a professional, such as a Tile Installater Salem, ensures that repairs are done efficiently and effectively, preserving the beauty and functionality of your tile surfaces.
FAQs
How much does tile installation typically cost?
The cost of tile installation varies based on the tile type and project complexity but generally ranges between $3 to $15 per square foot, inclusive of labor and materials.
How long does tile installation take?
The duration of tile installation projects can differ significantly based on size and difficulty. A standard bathroom can take 1-3 days, while larger spaces may require several days.
Can I install tile over existing flooring?
In many cases, tiles can be installed over existing flooring, provided the base is structurally sound and level. It’s advisable to assess the situation beforehand.
How can I choose the right tile for my project?
Consider your space’s function, design style, and maintenance needs when selecting tile. Research options, visit showrooms, and request samples for the best results.
What should I do if my tile cracks after installation?
If a tile cracks after installation, it’s best to contact a professional for repair. They can assess the damage and determine if just the tile needs replacing or if underlying issues exist.